
VMware Carbon Black
Sensor Gateway User
Guide
26 October 2023
VMware Carbon Black Cloud Workload 1.2
You can find the most up-to-date technical documentation on the VMware website at:
https://docs.vmware.com/
VMware, Inc.
3401 Hillview Ave.
Palo Alto, CA 94304
www.vmware.com
Copyright
©
2023 VMware, Inc. All rights reserved. Copyright and trademark information.
VMware Carbon Black Sensor Gateway User Guide
VMware, Inc. 2
Contents
1 VMware Carbon Black Sensor Gateway User Guide 4
2 Sensor Gateway Overview 5
3
Installing and Using Carbon Black Sensor Gateway 6
Preparing for Sensor Gateway Installation 6
Set Up Your Environment 6
Provision Sensor Gateway API Key 7
Carbon Black Cloud Access 9
Sensor Gateway Certificates 10
Create a Certificate Chain File 11
Install Sensor Gateway as an Appliance 12
Reconfigure the Sensor Gateway Appliance 19
Update Sensor Gateway Appliance Certificate 21
Update HTTPS Proxy Certificate 22
Installing Carbon Black Cloud Sensors 23
Set Up Your Environment for Sensor Installation 23
Install Carbon Black Cloud Sensor for Linux 25
Install Carbon Black Sensor for Windows 26
Manage Connectivity to Carbon Black Cloud 27
Sensor Gateway Notifications 28
Subscribe for Sensor Gateway Notifications 29
4 Upgrade Your Sensor Gateway Appliance 30
5 Troubleshooting Sensor Gateway 31
Sensor Gateway Appliance is Unreachable 31
6
Installing Sensor Gateway on Linux 32
Set Up Your Environment for Sensor Gateway Installation 32
Install Sensor Gateway on a Linux Server 34
Update Sensor Gateway Certificate 37
Upgrade Your Linux Sensor Gateway 39
VMware, Inc.
3
VMware Carbon Black Sensor
Gateway User Guide
1
The Carbon BlackSensor Gateway User Guide provides information about how to install,
configure, and use VMware Carbon Black® Sensor Gateway™ to secure your Cloud connection.
The Sensor Gateway is an on-prem component that acts as a bridge for all inbound and
outbound communication between the Carbon Black sensors deployed on your workloads and
the Carbon Black Cloud.
Intended Audience
This guide is written for experienced Windows or Linux system administrators who are familiar
with virtual machine technology and data center operations. Also, it assumes familiarity with
VMware vSphere®, including VMware ESXi™, VMware vCenter Server®, and VMware Tools™.
VMware, Inc.
4
Sensor Gateway Overview
2
You can control the communication between the sensors installed on your assets and Carbon
Black Cloud. The sensors can connect either directly to the Cloud or through a Sensor Gateway.
You might want to consider using the Sensor Gateway in the following cases.
n When you operate a tightly controlled environment and want to ensure that your workloads
are secure and not directly exposed to the Internet traffic.
n To remove the burden of owning, managing, and budgeting for additional proxy servers.
n When you have network environments where sensor communication with the Carbon Black
Cloud is not possible due to corporate policy or compliance requirements.
The Sensor Gateway has a registration mechanism, which allows for communication only when
registered with Carbon Black Cloud. It uses the API key mechanism to ensure no rogue Sensor
Gateway servers can start communication with the Cloud.
With this release, Carbon Black Cloud supports Sensor Gateway deployment as an OVA. When
deploying the OVA, you can use either the vSphere Client or the ESXi Web Client. For details, see
Install Sensor Gateway as an Appliance.
The Carbon Black Cloud console triggers notifications for Sensor Gateway server failure
conditions, such as reaching maximum connections or resource capacity, or if the Sensor
Gateway is down.
VMware, Inc.
5

Installing and Using Carbon Black
Sensor Gateway
3
This section provides information about how to install, configure, and use the Sensor Gateway.
Read the following topics next:
n Preparing for Sensor Gateway Installation
n Install Sensor Gateway as an Appliance
n Installing Carbon Black Cloud Sensors
n Manage Connectivity to Carbon Black Cloud
n Sensor Gateway Notifications
Preparing for Sensor Gateway Installation
Prepare your environment before installing a Sensor Gateway.
Set Up Your Environment
To ensure a successful installation of the Sensor Gateway appliance, you must perform some
required tasks and pre-checks before running the installer.
n Provision an SSL signed certificate. Choose between:
n Certificate authority (CA) signed certificate. This certificate is the preferred choice. For
more information, see Sensor Gateway Certificates.
n Self-signed certificate. This certificate requires pushing these certificates into the trust
store of each sensor workload. For more information, see Sensor Gateway Certificates.
Note You need the private key for the certificate you are using.
n If you have a CA-signed certificate or an internal certificate that has an Online Certificate
Status Protocol (OCSP) responder, you might have to provision the entire certificate chain.
The Sensor Gateway uses the certificate and its chain to get the OCSP response and staple it
with every request. This ensures that the sensors do not reach out to the OCSP responders
directly.
Generate the Certificate Chain file by using any online service that offers a certificate chain
composition. For more information, see Create a Certificate Chain File.
VMware, Inc.
6

n Acquire a Static IP for each Sensor Gateway server.
n Reserve a DNS entry. For example, sensorgateway.company.com
To install the Sensor Gateway in your environment, map its DNS to the IP that you previously
allocated to the server.
Use the DNS mapping to IP if you plan to configure your Sensor Gateway with its FQDN.
Note You can use just an IP and create the certificates with the IP being the same as the CN.
n If you use the proxy feature of the Sensor Gateway and there is a proxy server that sits
between the Sensor Gateway and Carbon Black Cloud, you must ensure that the Carbon
Black Cloud URLs are accessible through the proxy.
n Set up a local mirror server for signature updates and configure your policy so that sensors
download updates from the local server. See Signature Mirror Instructions. If you set up
mirrors for the Update servers, verify that they are reachable through the proxy.
Provision Sensor Gateway API Key
You must generate an API key from the Carbon Black Cloud console and use the generated API
key to establish a connection between the Carbon Black Cloud console and the Sensor Gateway
deployed in the vCenter Server. If you are configuring multiple Sensor Gateways, generate a
separate API key for each instance.
Use the pre-defined custom access level and generate an API key for the Sensor Gateway. You
can use the same custom access level to configure multiple Sensor Gateway instances for your
organization.
Procedure
1 Log in to the Carbon Black Cloud console.
2 Go to the Settings > API Access > API Keys page.
3 Click Add API Key.
The Add API Key window displays.
4 Enter a name for your Sensor Gateway API key.
The name must be unique for your organization.
5 Select Custom from the Access Level type drop-down menu.
VMware Carbon Black Sensor Gateway User Guide
VMware, Inc. 7

6 Select Sensor Gateway from the Custom Access Level drop-down menu.
7 To generate the API key, click Save.
The Carbon Black Cloud console generates the API ID and API secret key.
8 Copy the credentials.
You use these keys later to establish a connection between the Sensor Gateway and Carbon
Black Cloud.
Note You can use only one set of API ID and secret key per Sensor Gateway. Once you
use the generated credentials for your Sensor Gateway, you cannot use the same API ID and
secret key for any other instance.
VMware Carbon Black Sensor Gateway User Guide
VMware, Inc. 8

9 To view and copy the API keys later, or generate new API secret key, perform the following
steps.
a Go to the Settings > API Access > API Keys page.
b Go to the Sensor Gateway API name created earlier and click the down arrow in the
Actions column.
c Select API Credentials.
The API Credentials dialog box displays. You can copy the API ID and API secret key.
Carbon Black Cloud Access
You must configure your firewall-protected network to allow connection to the following
environment-specific URLs.
To further configure your firewall and grant access to additional URLs, see Configure a Firewall.
Carbon Black Cloud API URLs
Environment AWS Region Carbon Black Cloud URL Device Services URL
Prod05 US-East-1
https://defense-
prod05.conferdeploy.net
https://dev-
prod05.conferdeploy.net
Prod06 EU-Central-1
https://defense-
eu.conferdeploy.net
https://dev-
prod06.conferdeploy.net
ProdNRT AP-Northeast-1
https://defense-
prodnrt.conferdeploy.net
https://dev-
prodnrt.conferdeploy.net
ProdSYD AP-Southeast-2
https://defense-
prodsyd.conferdeploy.net
https://dev-
prodsyd.conferdeploy.net
UK Point of
Presence
EU-West-2
https://
ew2.carbonblackcloud.vmware
.com
https://ew2-
device.carbonblackcloud.vmware.
com
Sensor Gateway Related URLs
Environment
Carbon Black Cloud
URL AWS URL IP Address Protocol/Port
Prod05
https://defense-
prod05.conferdepl
oy.net
psc-cwp-prod-
applianceservice-
content-us.s3.us-
east-1.amazonaws.
com
Dynamic TCP/443
Prod06
https://defense-
eu.conferdeploy.n
et
psc-cwp-prod-
applianceservice-
content-eu.s3.us-
east-1.amazonaws.
com
Dynamic TCP/443
VMware Carbon Black Sensor Gateway User Guide
VMware, Inc. 9

Environment
Carbon Black Cloud
URL AWS URL IP Address Protocol/Port
ProdNRT
https://defense-
prodnrt.conferdep
loy.net
psc-cwp-prod-
applianceservice-
content-au.s3.us-
east-1.amazonaws.
com
Dynamic TCP/443
ProdSYD
https://defense-
prodsyd.conferdep
loy.net
psc-cwp-prod-
applianceservice-
content-ap.s3.us-
east-1.amazonaws.
com
Dynamic TCP/443
UK Point of Presence
https://
ew2.carbonblackcl
oud.vmware.com
prd1ew2-
applianceservice-
infra-
content.s3.eu-
west-2.amazonaws.
com
Dynamic TCP/443
Sensor Gateway Certificates
A Carbon Black sensor talks to the Sensor Gateway through a certificate. The Sensor Gateway
can run on both CA-signed certificate and self-signed certificate. Carbon Black recommends
using the CA-signed certificates so you can install all needed certificates on all Sensor Gateway
servers at once instead of installing the trusted certificate on each machine individually.
CA-Signed Certificates
When the certificate authority (CA) issues a certificate, the certificate has a fully qualified domain
name (FQDN) associated with it and every browser or device, that trusts the CA, can talk to this
certificate.
For example, if you have a CA-signed certificate called sensorgateway.company.com, when you
open it up in a browser or when the Carbon Black sensor tries to talk to the Sensor Gateway, you
do not get a certificate validation error if the fully qualified domain name (FQDN) of the machine
matches the certificate.
In the process of generating a CA certificate, you can assign it an IP address. When a browser or
a Carbon Black sensor talks to the Sensor Gateway at the
https://sensorgateway.company.com
or the IP address (available in the subject alternative names or common names), neither the
browser, nor the sensor generate an error.
If you have a certificate with an IP address in the subject alternate name (SAN) and an FQDN in
the common name (CN), and some sensors access the Sensor Gateway using FQDN and others
through an IP address – you must register your Sensor Gateway entry point with an IP address. In
that way, when the Carbon Black Cloud sends an URL to the sensor, it modifies the URL to point
to the Sensor Gateway.
VMware Carbon Black Sensor Gateway User Guide
VMware, Inc. 10

Self-Signed Certificates
Similar to the CA-signed certificates, in self-signed certificates the CN provided at the time of
generating a certificate must match the FQDN or IP address of the machine. When generating
a self-signed certificate, you can provide an IP address or FQDN when prompted for a CN. For
example, if you use the IP address 192.168.10.100 for the CN of a self-signed certificate, you must
install this certificate on the Sensor Gateway machine, which has this same IP address. That way,
when the sensors access the Sensor Gateway, the certificate is valid.
Create a Certificate Chain File
Carbon Black uses a certificate chain file to perform a proper OCSP stapling.
You can generate a certificate chain by using any online Certificate Chain Composer. For
example, the KeyCDN Tools. The following procedure is an example of creating the certificate
chain by using the Certificate Chain Composer.
Procedure
1 Edit the certificate sgw_certificate.pem in any editor of your choice and copy all the
content along with
-----BEGIN CERTIFICATE----- and -----END CERTIFICATE-----.
If your certificate has the chain already, you might want to copy only the first occurrence of
-----BEGIN CERTIFICATE----- and -----END CERTIFICATE-----
2 Paste the content in the text box on the Certificate Chain Composer site and click Compose.
The tool generates the entire chain of certificates – your own certificate and all the
certificates that are used to sign your certificate. You can view the certificate chain in the
lower half of the page.
3 Copy the entire content and paste it in an editor of your choice.
Note Delete the section that corresponds to the section in your certificate from -----BEGIN
CERTIFICATE----- to -----END CERTIFICATE-----.
4 Save it as the sgw_chain.pem file.
5 Copy the sgw_chain.pem file in the /data/certs directory on the server hosting the Sensor
Gateway.
VMware Carbon Black Sensor Gateway User Guide
VMware, Inc. 11

6 To ensure that the OCSP Stapling works correctly for the Sensor Gateway, run the following
commands.
a openssl x509 -noout -ocsp_uri -in sgw_certificate.pem
Prints out the OCSP responder URL for your certificate.
b openssl ocsp -issuer sgw_chain.pem -cert sgw_certificate.pem -verify_other
sgw_chain.pem -CAfile sgw_chain.pem -no_nonce -url <OCSP Responder URL from
Previous Command>
Prints out the response from the OCSP Responder. For example,
sgw_certificate.pem: good
This Update: Jul 18 15:35:01 2023 GMT
Next Update: Jul 25 15:35:00 2023 GMT
If there is no response, you might check the network connectivity/firewall configuration to
ensure that the OCSP response is received from the OCSP responder.
Install Sensor Gateway as an Appliance
You install a Sensor Gateway on a Windows virtual machine either from a vSphere Client or
directly on an ESXi host by using its Web client interface. You can select between installing an
OVA file or an OVF file.
Alternatively to the procedure below, to deploy the Sensor Gateway appliance
directly on the ESXi host, log in to the ESXi Web Client interface (https://
ESXi_host_IP_address_or_hostname), right-click Virtual Machines, and select Create/Register
VM. Once you select Deploy a virtual machine from an OVF or OVA file, you can proceed with
the installation wizard by referring to step 4 and onwards.
Prerequisites
n Verify that you have available the API access credentials. For details, see Provision Sensor
Gateway API Key.
n Verify that your environment is configured with the necessary network settings. For details,
see Configure a Firewall.
n Verify that the firewall setup on your virtual machine does not block
projects.registry.vmware.com on port 443.
VMware Carbon Black Sensor Gateway User Guide
VMware, Inc. 12

Procedure
1 Log in to your vCenter Server by using the vSphere Client.
a Open a Web browser and enter the URL for your vCenter Server instance: https://
vcenter_server_ip_address_or_fqdn
b If a warning message about a potential security risk appears, select to continue to the
website.
Browser Action
Microsoft Edge 1 Click Details.
2 Under the message that appears, click Go on to the webpage.
Mozilla Firefox 1 Click Advanced.
2 Under the message that appears, click Accept the risk and continue.
Google Chrome 1 Click Advanced.
2 Under the message that appears, click Proceed to
vcenter_server_ip_address_or_fqdn
.
c On the vSphere Welcome page, select Launch vSphere Client (HTML5).
d Enter the credentials of a user who has permissions on vCenter Server and click Login.
The vSphere Client connects to all the vCenter Server systems on which the specified
user has permissions, and you can view and manage the vSphere inventory.
2 To retrieve the Sensor Gateway appliance sgw-va-1.2.0.0-22635557_OVF10.ova, go to
the Customer Connect Download page and click Download Now under the CBC-CWP-
SensorGateway-OVA-122.
VMware Carbon Black Sensor Gateway User Guide
VMware, Inc. 13

3 Navigate to a cluster within your data center, right-click on an ESXi host, and select Deploy
OVF Template.
The Deploy OVF Template wizard displays.
4 Select a template by either of the following options and click Next.
n To use the copied OVA link address, select URL and paste the address.
n To use a locally saved OVA file, select Local file and upload the OVA. If you upload an
OVF file, you must also upload all VMDK files that relate to the OVF.
5 Enter a unique name identifier and select the location for your deployed Sensor Gateway
virtual machine.
6 On the next page, select the compute resource you want to use for your deployed Sensor
Gateway and click Next.
Verify that the appliance is compatible with the selected resource.
7 Review and verify the details for the virtual appliance and click Next.
8 Read and accept the end-user license agreement, then select Next.
VMware Carbon Black Sensor Gateway User Guide
VMware, Inc. 14

9 Select a virtual disk format and storage location.
Virtual Disk Format Advantages Disadvantages
Thin Provisioned n Fastest to provision
n Allows disk space to be over-
committed to VMs
n Slowest performance due to
metadata allocation overhead
and additional overhead during
initial write operations
n Over-commitment of storage
can lead to application
disruption or downtime if
resources are actually used
n Does not support clustering
features
Thick Provisioned Lazy Zeroed n Faster to provision than Thick
Provisioned Eager Zeroed
n Better performance than Thin
Provisioned
n Slightly slower to provision than
Thin Provisioned
n Slower performance than Thick
Provisioned Eager Zero
n Does not support clustering
features
Thick Provisioned Eager Zeroed n Best performance
n Overwriting allocated disk space
with zeros reduces possible
security risks
n Supports clustering features
such as Microsoft Cluster Server
(MSCS) and VMware Fault
Tolerance
Longest time to provision
10 Select a destination network for each source network and click Next.
You can keep the default.
11 Configure the deployment settings for the Sensor Gateway virtual machine.
Option
Action Example
Initial root password Enter a password for the root
user account.
Initial admin password Enter a password for the
admin user account.
CBC URL Enter the CBC URL that
represents the environment
where your services are
hosted. Carbon Black Cloud is
hosted in several regions and
the URL might be different. For
a list of Carbon Black Cloud
environments, see Carbon
Black Cloud Access.
https://defense-
prod05.conferdeploy.net
Note Ensure that the value begins
with https://
API ID To allow authenticated
communication between a
9Z5QY2ZDAN
VMware Carbon Black Sensor Gateway User Guide
VMware, Inc. 15

Option Action Example
Sensor Gateway and the
Carbon Black Cloud, enter
the Carbon Black Cloud API
ID and API Secret Key. You
generate them in pairs by
using the Carbon Black Cloud
console. If there is a mismatch,
Carbon Black Cloud rejects any
communication coming from
the Sensor Gateway.
Note Due to the
use of sensitive data, the
vSphere Client prompts for a
confirmation twice and hides
the value in the UI.
API Secret Key 8UE3SHE470T2LZLJZJ2M98TY
Important You must generate a
new API ID and API Secret Key for
every Sensor Gateway instance.
Sensor Gateway Entry Point
(https://<sensor-gateway-node-
fqdn>)
To define how the sensors
address the Sensor Gateway,
enter a Sensor Gateway entry
point. The entry point must
match the following:
n If you use a CA-signed or
self-signed certificate, the
value must be the same
as the common name (CN)
given to the certificate.
n The IP address or the
FQDN of the machine must
be the same as the CN of
the certificate.
https://
sensorgateway.company.com
This example assumes that
the CN of the certificate is
sensorgateway.company.com
Note Since the Sensor Gateway
hosts its services by using SSL,
ensure the value begins with
https://
Sensor Gateway Certificate Paste the content, including
BEGIN and END lines, of the
Sensor Gateway certificate file.
It allows the Carbon Black
sensor to talk to the Sensor
Gateway.
Sensor Gateway Certificate Private Key Paste the content, including
BEGIN and END lines, of the
Sensor Gateway certificate
private key file in the
Password field.
Note Due to the
use of sensitive data, the
vSphere Client prompts for a
confirmation twice and hides
the value in the UI.
Sensor Gateway Certificate Chain Paste the content, including
BEGIN and END lines, of the
Sensor Gateway certificate
chain file.
VMware Carbon Black Sensor Gateway User Guide
VMware, Inc. 16

Option Action Example
Sensor Gateway Certificate Passphrase Use the same password
you created at the time
of certificate generation to
protect the private key.
The Sensor Gateway uses
this password to encrypt
its communication with the
Carbon Black sensor.
Note Due to the
use of sensitive data, the
vSphere Client prompts for a
confirmation twice and hides
the value in the UI.
Proxy Type To have the Sensor Gateway
communicate over a proxy,
select the proxy type.
n By default, None
n HTTP or HTTPS. For
each, choose one of the
following options:
n Proxy Host: Provide the
FQDN or IP address of
the Proxy Host
n Proxy Port: Provide
the port where the
Proxy server receives
requests
If you select HTTPS as your
proxy type, you must include
HTTPS Proxy Certificate.
Proxy Host Enter the FQDN or IP address
of the Proxy Host.
Proxy Port By default, the Sensor
Gateway hosts its services
over SSL on port 443. If
this port is in use on the
virtual machine where you are
installing the Sensor Gateway,
you can enter a different port.
HTTPS Proxy Certificate If you selected HTTPS as the
proxy type, paste the entire
content of the HTTPS proxy
certificate file.
To avoid updating the HTTPS
proxy certificate,Carbon Black
recommends that you include
the issuer of the certificate.
VMware Carbon Black Sensor Gateway User Guide
VMware, Inc. 17

Option Action Example
Default Gateway Optional. Set the default
gateway for this virtual
machine.
Although input is optional, to have
a static DNS and static IP allocated
to the Sensor Gateway, you must
populate these fields. If you leave
them blank, the Sensor Gateway
aquires its IP address from the
DHCP server.
Domain Name Optional. Enter the domain
name for the virtual machine.
Domain Search Path Optional. Enter the domain
names for this virtual machine.
Domain Name Servers Optional. Enter the IP
addresses for this virtual
machine that are mapped to
the domain names.
Network 1 IP Address Optional. Set the IP address for
the network interface.
Network 1 Netmask Optional. Set the netmask
or prefix for the network
interface.
12 Review your configuration setup and click Finish.
Results
You can monitor the deployment progress under the Recent Tasks tab or by navigating to the
Monitor > Tasks page. It takes some time for the deployment to complete.
VMware Carbon Black Sensor Gateway User Guide
VMware, Inc. 18
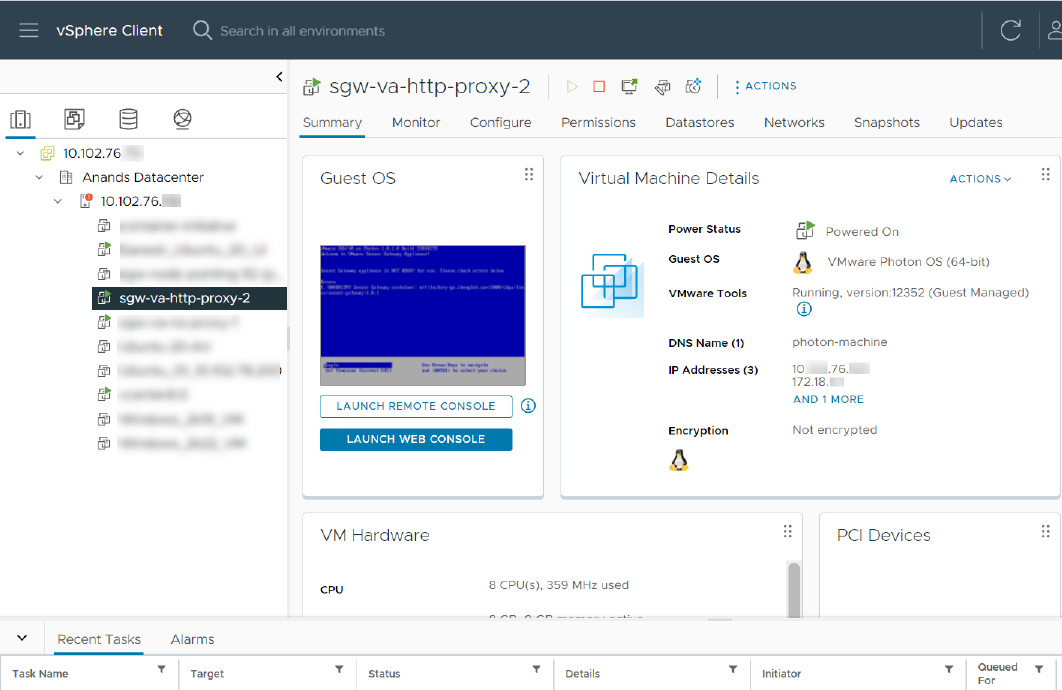
What to do next
Once the Sensor Gateway virtual machine is imported and deployed, you can power it on. It
takes some time for the operation to complete.
After the appliance boots up, if you configured the Sensor Gateway virtual machine successfully,
you can see it registered with the Carbon Black Cloud console under the Settings > API Access >
Sensor Gateway tab.
If the appliance deployment ends with a failure, use the SGW configurator tool to re-enter the
settings and restart the appliance. For details, see Reconfigure the Sensor Gateway Appliance.
Reconfigure the Sensor Gateway Appliance
To update the initial configuration you set during the Sensor Gateway OVA installation, use the
Sensor Gateway (SGW) Configurator tool.
As a system administrator, you use the tool to update any appliance settings you previously
specified and restart the Sensor Gateway to apply the new configuration. Carbon Black
recommends that you use the configurator tool if the Sensor Gateway deployment fails.
There are settings in the SGW configurator tool, which have dependencies. When changing such
a field, you must update its dependent fields as well. The following table lists the fields you can
update with the configurator and their dependencies if any.
VMware Carbon Black Sensor Gateway User Guide
VMware, Inc. 19

Sensor Gateway Setting Dependent Sensor Gateway Settings Notes
CBC URL API ID, API Secret Key If you change the Carbon Black
Cloud URL, update the API ID and
API secret key only if the Sensor
Gateway is already registered with
Carbon Black Cloud - there is an
existing CBC URL and generated API
ID.
API ID API Secret Key If you generated the API secret key
from a different environment, update
the Carbon Black Cloud URL to point
to that environment.
API Secret Key None -
Entry Point URL API ID, API Secret Key, and
certificates
If you change the Sensor Gateway
entry point, re-enter the entire
content of the certificate.
Proxy Type None -
Proxy Host Proxy Certificate
When proxy type is set to HTTPS.
-
Proxy Port None -
Procedure
1 Log in to the Sensor Gateway appliance as an admin user.
2 Run the configurator command.
$ configure-sgw
The SGW Configurator terminal UI appears. You can navigate through the configurator
options by using the keyboard arrows or the letters in the square brackets.
3 Update either of the settings under General Settings or TLS settings.
For example, if you must update the connection to the Carbon Black Cloud, enter the new
Carbon Black Cloud URL in the related field.
If you enter an invalid value, an error message displays with suggestion for a valid input. If
you enter a valid URL, a success message displays.
4 To return to the main menu, select Back.
5 Optional. Repeat step 3 to update any of the required values.
6 To keep your changes, select Save and Quit.
7 Review the updated values and confirm your changes.
VMware Carbon Black Sensor Gateway User Guide
VMware, Inc. 20

Results
The SGW Configurator tool restarts the Sensor Gateway service with the updated configuration.
What to do next
To access the log file and view summary of all your configuration changes, run the command
$ vim /opt/vmware/sgw/data/logs/configure-sgw.log
Note The log file hides sensitive data, such as the private key.
Update Sensor Gateway Appliance Certificate
You can update the TLS certificate of a Sensor Gateway OVA when the certificate is about to
expire, or it has been compromised, and avoid getting the sensors permanently disconnected
from the Carbon Black Cloud.
Prerequisites
Verify that all sensors are connected to the Sensor Gateway appliance to access and download
the new certificate. When you upload a new certificate, Carbon Black Cloud sends it to each
sensor inidividually.
Important Virtual machines that are shut down might not receive the new certificate. The
sensors are not able to connect to the Carbon Black Cloud when the new certificate is replaced
on the Sensor Gateway. Therefore, to receive the new certificate and avoid connectivity issues,
ensure that all sensors connected through the Sensor Gateway are in an active state.
Procedure
1 Obtain a new certificate.
The new certificate must have the same common name (CN) as the current certificate.
2 Navigate to the Settings > API Access > Sensor Gateways tab and double-click the Sensor
Gateway OVA for which you must renew the certificate.
3 In the Sensor Gateway Details section, select the Options drop-down menu and click Update
certificate.
4 Click Upload File, select the newly obtained certificate, upload it, and click Close.
It takes up to eighty minutes for the process to complete depending on the number
of sensors connected to this Sensor Gateway. The Carbon Black Cloud sends the newly
uploaded certificate to all sensors connected to the Cloud through this Sensor Gateway.
Then, each sensor sends a status back to the Cloud confirming if it has successfully accepted
the new certificate. The Carbon Black Cloud console displays only the errors received by the
sensors.
VMware Carbon Black Sensor Gateway User Guide
VMware, Inc. 21

5 To see errors reported by the connected to the Sensor Gateway sensors, navigate to the
Inventory > VM Workloads > Enabled tab.
a Select the Sensor Gateway from the Sensor Gateway filter facet.
b Select Errors from the Status filter facet.
c To see the details for the sensor reporting the error, double-click the relevant row.
d You might fix existing errors by uploading the new certificate again.
If the errors are still present, contact Carbon Black Cloud Support.
Important Continue with updating the certificate on the Sensor Gateway only if there are no
errors reported by the sensors connected to this Sensor Gateway in the Carbon Black Cloud
console.
6 Replace the TLS certificate of the Sensor Gateway deployed as an OVA.
a Log in to the Sensor Gateway appliance as an admin user.
b Run the configurator command.
$ configure-sgw
The SGW Configurator terminal UI displays.
c Select TLS Settings > Sensor Gateway > Sensor Gateway Certificate.
d When promted, paste the content of the new certificate, including the BEGIN
CERTIFICATE and END CERTIFICATE lines, and press Ctrl+D twice.
The configuration tool validates the content in the background. If the new certificate is
invalid, an error displays.
e To keep your changes, select Save and Quit.
The SGW Configurator tool restarts the Sensor Gateway service with the updated
configuration.
Results
It takes up to five minutes for the Sensor Gateway to register again with the Carbon Black Cloud.
Update HTTPS Proxy Certificate
If during the Sensor Gateway appliance installation you specified the proxy type as an HTTPS,
you also included an HTTPS proxy certificate. Follow this procedure to update the proxy
certificate when it is about to expire or it has been compromised.
You use the SGW Configurator tool to update the proxy certificate. For details on how to use the
tool, see Reconfigure the Sensor Gateway Appliance.
VMware Carbon Black Sensor Gateway User Guide
VMware, Inc. 22

Prerequisites
Ensure that you can provide either of the following:
n Recommended. The issuer of the HTTPS proxy certificate. If you provide the Certificate
Authority, you do not have to update the Sensor Gateway proxy certificate when it is about
to expire.
n The certificate chain of the Proxy server. If you use the certificate chain, you must update the
Sensor Gateway proxy certificate.
Procedure
1 Obtain the new HTTPS proxy certificate.
2 Log in to the Sensor Gateway appliance as an admin user.
3 Run the configurator command.
$ configure-sgw
The SGW Configurator terminal UI appears. You can navigate through the configurator
options by using the keyboard arrows or the letters in the square brackets.
4 Select TLS settings > Proxy > Proxy Certificate.
5 Paste the entire content of the new proxy certificate, including the BEGIN CERTIFICATE and
End CERTIFICATE lines, and press Ctrl+D.
If you entered wrong content, you get an error such as ERROR: You've entered invalid
value. Please enter a valid X509 certificate.
6 To keep your changes, select Save and Quit.
7 Review the updated values and confirm your changes.
Results
The SGW Configurator tool restarts the Sensor Gateway service with the updated configuration.
Installing Carbon Black Cloud Sensors
Once you install the Sensor Gateway and register it with the Carbon Black Cloud, you can
perform a fresh Carbon Black sensor install.
Set Up Your Environment for Sensor Installation
Consider the following environment setup before installing a Carbon Black sensor.
Locate a Sensor Gateway Instance
You can use the Carbon Black Cloud console to locate the Sensor Gateway instance.
VMware Carbon Black Sensor Gateway User Guide
VMware, Inc. 23

Procedure
1 Log in to the Carbon Black Cloud console with your account credentials.
2 On the left navigation bar, select Settings > API Access > Sensor Gateways.
3 Find the Name of the Sensor Gateway corresponding to the IP address or the API ID.
4 Note this name as you need it when generating the company code.
Generate a Company Code
You must generate a company code prior sensor installation. You can obtain the company code
by using the Carbon Black Cloud console.
Procedure
1 On the left navigation bar, select Inventory > VM Workloads.
2 Select View company codes from the Sensor Options drop-down menu.
3 Click the Connect to Carbon Black Cloud through Sensor Gateway option.
The Sensor Gateway drop-down menu becomes available.
4 Select the Sensor Gateway entry point URL you want to use for the sensor installation.
The drop-down menu displays only the URLs for the connected Sensor Gateways.
5 Copy the Registration code.
This is the company code you use when installing the sensors.
VMware Carbon Black Sensor Gateway User Guide
VMware, Inc. 24

Install Carbon Black Cloud Sensor for Linux
To have the Carbon Black sensor on your Linux VM workload communicating with the Carbon
Black Cloud through a Sensor Gateway, you must install and configure the sensor to work with
the Sensor Gateway.
Prerequisites
n Verify that you have access to the latest Carbon Black sensor for Linux version (2.15+).
n For information on using the Carbon Black Cloud console to install sensors on VM
workloads, see
VMware Carbon Black Cloud Sensor Installation Guide
. If you install the sensor
through the console UI, include the UseSystemCerts=true property in the /var/opt/
carbonblack/psc/cfg.ini file. For details, see Installing Linux Sensors on Endpoints.
n Ensure that you have the company code available. For more information, see Generate a
Company Code.
Procedure
1 Download the latest version of the Carbon Black sensor for Linux.
2 Omit if the Sensor Gateway is already configured with CA-signed certificate. To use a self-
signed certificate in the Sensor Gateway, you must add the certificate chain into the trust
store.
a Copy the certificate sgw_certificate.pem file, which you intend to use for
communication with the Sensor Gateway, into a known location on your Linux VM
workload.
b Add the content of the self-signed certificate sgw_certificate.pem into the CA signed
certificate ca-certificates.crt file on your VM workload.
cat sgw_certificate.pem >> CERTFILE_PATH
The CERTFILE_PATH points to /etc/ssl/certs/ca-certificates.crt on most Linux
systems. However, you must confirm in the documentation of your distro to select the
Trusted CA certs file.
3 Retrieve the sensor installation file by running the command:
wget <location of the sensor installation file>
4 Unzip the sensor installation file:
tar -xvf <tgz installation file>
5 Use the company code you previously generated to complete the sensor installation.
./install.sh "<company_code>" --sensor-gateway-cert CERTFILE_PATH
VMware Carbon Black Sensor Gateway User Guide
VMware, Inc. 25

The CERTFILE_PATH points to /etc/ssl/certs/ca-certificates.crt on most Linux
systems. However, we recommend you confirm in the documentation of your distro to select
the Trusted CA certs file.
Results
Once your sensor is successfully installed, you can see the running Sensor Gateway in the
Carbon Black Cloud console.
What to do next
If needed, you can uninstall the sensor from your Linux workload by running the command:
dpkg --purge cb-psc-sensor
Install Carbon Black Sensor for Windows
After your Sensor Gateway is up and running, you must perform a fresh sensor install. You install
a Carbon Black sensor on your Windows VM workload and configure it to communicate with the
Carbon Black Cloud through the Sensor Gateway.
Prerequisites
n Ensure you have access to the latest Carbon Black sensor for Windows version (3.8.0.684+).
n For information on using the Carbon Black Cloud console to install sensors on VM workloads,
see
VMware Carbon Black Cloud Sensor Installation Guide
.
n Ensure that you have the company code available. For more information, see Generate a
Company Code.
n If you install the Carbon Black sensor in a Sensor Gateway environment configured with
proxy, you might see the local scanner setting UpdateServers set to None after the sensor
installation completes. By default, the sensor uses a random timeout (up to 2 hours) to
download the signature packs in case a large number of sensors are being deployed. To
avoid the random delay in the signatures download, set the DELAY_SIG_DOWNLOAD command
line parameter to 0 during the sensor installation. For information on Windows sensor
supported commands, see
VMware Carbon Black Cloud Sensor Installation Guide
.
VMware Carbon Black Sensor Gateway User Guide
VMware, Inc. 26

Procedure
1 Omit this step if the Sensor Gateway uses a CA-signed certificate. Add a self-signed
certificate in the Trusted Root Certificates folder on the Windows VM workload.
The sensor uses this certificate to communicate with the Sensor
Gateway
2 Download the sensor installer.
3 Install the sensor by using the Carbon Black Cloud console or by existing scripts.
4 Use the company code you previously generated to complete the sensor installation.
Once your sensor is successfully installed, you can see the running Sensor Gateway in the
Carbon Black Cloud console.
Manage Connectivity to Carbon Black Cloud
Use Carbon Black Cloud console to manage the connection between your sensor and Carbon
Black Cloud. You can have your workloads communicate with Carbon Black Cloud either directly,
or through a Sensor Gateway.
Prerequisites
Verify that you have installed Carbon Black sensor for Windows 3.9+
Procedure
1 Log in to the Carbon Black Cloud console.
2 On the left navigation pane, click Inventory > VM Workloads or Inventory > Endpoints and
select the Enabled tab.
3 Locate the Status column and select the check box for one or more VM workloads or
Endpoints you want to take action upon.
The Take Action drop-down menu appears.
VMware Carbon Black Sensor Gateway User Guide
VMware, Inc. 27

4 Select Manage Sensor Gateway connection.
The Manage Sensor Gateway Connection window displays.
5 Perform one of the following.
n To assign a Sensor Gateway, click the Connect through Sensor Gateway drop-down
menu and select an entry point.
If this connection exceeds the number of supported sensors, you are notified immediately
upon your Sensor Gateway selection.
If you performed a bulk selection of assets in the Enabled tab and the total number of
the assets exceeds a single page size, a check box appears for applying this setting to all
assets.
n If there is an issue with your Sensor Gateway, to have the sensor communicate directly to
Carbon Black Cloud, select Connect directly.
6 To change the connection type between the sensor and Carbon Black Cloud, click Apply.
Results
It takes up to ten minutes for the console to reflect the changes.
Sensor Gateway Notifications
After you install and start running one or more Sensor Gateway servers, you can use the Carbon
Black Cloud console to subscribe to Sensor Gateway failure notifications.
After you are subscribed, you get in-product notifications and notifications through email in the
following cases:
n When one or more Sensor Gateway instances in your organization have not responded in the
last five minutes or less and are currently disconnected from the Carbon Black Cloud .
VMware Carbon Black Sensor Gateway User Guide
VMware, Inc. 28

n When one or more Sensor Gateway instances in your organization exceed the number of
configured sensors. .
Note Each Sensor Gateway supports up to ten thousand Carbon Black Cloud sensors
Subscribe for Sensor Gateway Notifications
Use the following procedure to receive in-product and email notificaitons on the state of your
registered Sensor Gateway instances.
Procedure
1 While on the Settings > Notifications page, select the Integrations tab.
2 Click Add Notification.
3 Provide a name for the notification and select Sensor Gateway from the Component type
drop-down menu.
4 Choose when you want to be notified - when the Sensor Gateway is disconnected, when the
maximum number of 10,000
Carbon Black sensors is exceeded, or when the Sensor Gateway
certificate is about to expire, or all of them.
5 Add all the users you would like to receive the notifications through an email from the related
drop-down menu.
You define these users in the Settings > Users page.
6 Optional. To receive a notification at the end of the day with a summary of all gateways that
are still unresolved in your environment, click the Send 1 reminder email at the end of the day
option.
Sensor Gateway instances that are already with restored connections are excluded.
7 To complete the notification subscription setup, click Save.
VMware Carbon Black Sensor Gateway User Guide
VMware, Inc. 29

Upgrade Your Sensor Gateway
Appliance
4
You upgrade your Sensor Gateway appliance with the latest version available by using the
Carbon Black Cloud console.
Note
n Make sure you do not power down your Sensor Gateway appliance while the upgrade is in
progress. Otherwise, you might have to reinstall the Sensor Gateway.
n Sensors connected to the Sensor Gateway you are about to upgrade might loose
connectivity to the
Carbon Black Cloud during the upgrade.
n Carbon Black Cloud provides a fallback mechanism in case of a system error or if you decide
to revert to a previous version of the Sensor Gateway.
Procedure
1 Log in to the Carbon Black Cloud console.
2 Navigate to the Settings > API Access > Sensor Gateways tab.
3 Double-click the Sensor Gateway you wish to upgrade.
The Sensor Gateway Details pane displays the current version of the Sensor Gateway and
the newly available version in parentheses.
4 Click the Options drop-down menu and select Upgrade version.
The Upgrade Sensor Gateway window displays.
5 To confirm the upgrade, select Upgrade.
Results
The Sensor Gateway upgrades successfully and the sensors resume their connectivity to the
Cloud.
What to do next
Navigate to the Settings > Audit Log page where you can view the status of the upgarde. For
example, when it started and if it is successful.
VMware, Inc.
30
Troubleshooting Sensor Gateway
5
Use the troubleshooting topics to find solutions for situations when installing, using and
upgrading the Sensor Gateway does not work as expected.
Read the following topics next:
n Sensor Gateway Appliance is Unreachable
Sensor Gateway Appliance is Unreachable
Problem
You might expereince a communication issue with the Carbon Black Sensor Gateway appliance.
Cause
The virtual machine is powered off.
Solution
Power on the virtual machine and wait for it to enter in a healthy state. If the operational state
is not healthy after few restarts, initiate a new installation of the Sensor Gateway appliance. See
Install Sensor Gateway as an Appliance.
In the process of installing the Sensor Gateway appliance, ensure that you provide the Sensor
Gateway entry point URL. The entry point URL must match the common name (CN) you provided
when generating the Sensor Gateway certificate. For more information, see Sensor Gateway
Certificates.
VMware, Inc.
31

Installing Sensor Gateway on
Linux
6
Use the following procedures to set up your Linux server and install the Sensor Gateway on the
configured Linux machine.
Important Carbon Black recommends that you set up your system with the Sensor Gateway
appliance. For details, see Install Sensor Gateway as an Appliance. Sensor Gateway for Linux and
the related HA capabilities are going to be deprecated soon.
Read the following topics next:
n Set Up Your Environment for Sensor Gateway Installation
n Install Sensor Gateway on a Linux Server
n Upgrade Your Linux Sensor Gateway
Set Up Your Environment for Sensor Gateway Installation
To set up each of your Linux servers for the Sensor Gateway installation, follow this procedure.
Prerequisites
n Provision an SSL signed certificate. Choose between:
n Certificate authority (CA) signed certificate. This certificate is the preferred choice. For
more information, see Sensor Gateway Certificates.
n Self-signed certificate. This certificate requires pushing these certificates into the trust
store of each sensor workload. For more information, see Sensor Gateway Certificates.
Note You need the private key for the certificate you are using.
n If you have a CA-signed certificate or an internal certificate that has an Online Certificate
Status Protocol (OCSP) responder, you might have to provision the entire certificate chain.
The Sensor Gateway uses the certificate and its chain to get the OCSP response and staple it
with every request. This ensures that the sensors do not reach out to the OCSP responders
directly.
Generate the Certificate Chain file by using any online service that offers a certificate chain
composition. For more information, see Create a Certificate Chain File.
VMware, Inc.
32

n Acquire a Static IP for each Sensor Gateway server.
n Reserve a DNS entry. For example, sensorgateway.company.com
To install the Sensor Gateway in your environment, map its DNS to the IP that you previously
allocated to the server.
Use the DNS mapping to IP if you plan to configure your Sensor Gateway with its FQDN.
Note You can use just an IP and create the certificates with the IP being the same as the CN.
n Verify that sensors can reach the Sensor Gateway.
n Verify that the Sensor Gateway has connectivity to the Internet. The Sensor Gateway must
have connectivity to Carbon Black Cloud. However, it might need to reach out to CA
providers to get Online Certificate Status Protocol (OCSP) responses for the validity of its
digital certificate.
n To have the Sensor Gateway running behind a proxy, ensure you configure the Docker client
to use proxy. For more information, see Configure Docker to use a proxy server.
n If you use the proxy feature of the Sensor Gateway and there is a proxy server that sits
between the Sensor Gateway and Carbon Black Cloud, you must ensure that the Carbon
Black Cloud URLs are accessible through the proxy. If you set up mirrors for the Update
servers, verify that they are reachable through the proxy as well.
n Verify that your environment is configured with the necessary network settings. For details,
see Configure a Firewall.
n Verify that your firewall setup does not block projects.registry.vmware.com on port 443.
Procedure
1 Log in to your server as root and ensure OpenSSL is installed.
If not already, install OpenSSL using a system package manager.
2 Prepare the certificates.
a Name the SSL Certificate file as sgw_certificate.pem.
b Name the SSL Certificate Private Key file as sgw_key.pem.
c (Omit this step if you are using a self-signed certificate.) Name the SSL Certificate Chain
file as sgw_chain.pem.
d (Omit this step if you are using a self-signed certificate.) To verify if the certificate is valid,
run the command:
openssl verify -CAfile sgw_chain.pem sgw_certificate.pem
If the certificate is valid, you get the response: sgw_certificate.pem: OK
VMware Carbon Black Sensor Gateway User Guide
VMware, Inc. 33

e Create /data folder at the root level and make the following subfolders on your server.
n /data/certs - Stores certificates, keys, and optionally, certificate chain file.
n /data/logs - Stores the logs generated at runtime.
f Copy the certificate, the private key, and the chain file in the /data/certs directory.
Note You do not need the chain file if you are using self-signed certificate.
3 Download the script, which installs and sets up the Sensor Gateway on each server
individually.
wget https://prod.cwp.carbonblack.io/sgw/installer/linux/1.2.0/sensor_gw_install.zip
4 Unzip the Sensor Gateway installation zip file in the location where you downloaded it. Locate
the shell script sensor_gw_install.sh.
5 By default, the shell script is not executable. Run the following command to make the script
executable.
chmod +x sensor_gw_install.sh
6 Acquire the Sensor Gateway registration API key.
For details, see Provision Sensor Gateway API Key.
What to do next
Install the Sensor Gateway.
Install Sensor Gateway on a Linux Server
You host the Sensor Gateway on a Linux machine as a container image. Therefore, the Linux
server must have a container running capability. In this type of installation, if you want to install
more than one Sensor Gateway servers, you must repeat the following steps for every Sensor
Gateway server.
The following high level installation workflow depicts the steps for installing and configuring
various components in your system so the sensors can communicate with Carbon Black Cloud
through the Sensor Gateway.
VMware Carbon Black Sensor Gateway User Guide
VMware, Inc. 34

Prerequisites
n Verify that port 443 is open on the Sensor Gateway.
n To have the Sensor Gateway running behind a proxy, ensure you configure the Docker client
to use proxy. For more information, see Configure Docker to use a proxy server.
Procedure
1 Install Docker.
For information about installing a Docker engine on the supported by the Sensor Gateway
Linux distributions, see Install Docker Engine on CentOS, Install Docker Engine on RHEL, or
Install Docker Engine on Ubuntu.
2 Make the installation script executable if not so already.
chmod +x sensor_gw_install.sh
3 Run the installation script.
./sensor_gw_install.sh
VMware Carbon Black Sensor Gateway User Guide
VMware, Inc. 35

4 When prompted, provide the following input.
Option Description Example
API ID The API ID and API Secret Key generated on the
Carbon Black Cloud console allow an authenticated
communication between the Sensor Gateway and the
Carbon Black Cloud.
Both the API ID and API Secret Key are generated in
pair. Any mismatch and the Carbon Black Cloud rejects
any communication coming from the Sensor Gateway.
Note You must generate new API ID and API Secret
Key for every Sensor Gateway.
9Z5QY2ZDAN
API Secret Key 8UE3SHE475T2LZLJNJ2M98TK
Carbon Black
Cloud URL
This URL represents the environment where your
services are hosted. Carbon Black Cloud is hosted in
several regions and the URL might be different. For a
list of Carbon Black Cloud environments, see Carbon
Black Cloud Access.
https://defense-
prod05.conferdeploy.net
Note Ensure the value begins with
a https://
Sensor Gateway
entry point URL
(https://<sensor-
gateway-node-
fqdn>)
An entry point means how the sensors would typically
address the Sensor Gateway as.
This must match the following:
n If you use a CA-signed or self-signed certificate, this
value should be the same as the CN given to the
certificate.
n The IP address or the FQDN of the machine must
be the same as the CN of the certificate.
https://
sensorgateway.company.com
This example assumes that
the CN of the certificate is
sensorgateway.company.com
Note Since the Sensor Gateway
services are hosted using SSL,
ensure the value begins with
https://
Proxy type n None: This is the default option.
n HTTPS or HTTP: For each choose one of the
following options:
n Proxy Host: Provide the FQDN or IP address of
the Proxy Host.
n Proxy Port: Provide the port where the Proxy
server receives requests.
HTTP
Optional:
Volume mount
directory
The Sensor Gateway uses a fixed directory to look for
certificates and to store logs.
If you do not provide a value, the default location is a /
data
directory. If you choose to store your certificates
or logs in a different directory, you can provide an
absolute path here.
If you choose to have a different folder, ensure you
create certs and logs folder underneath this path. At
the same time you must ensure the certificate, private
key, and certificate chain (optional) are stored in the
certs folder before you proceed on the next parameter.
Since the install script executes with root permissions,
by default all these directories will have root
permissions as owner and group.
/data
VMware Carbon Black Sensor Gateway User Guide
VMware, Inc. 36

Option Description Example
Optional: Port
where Sensor
Gateway runs
By default the Sensor Gateway services are hosted
over SSL on port 443. If this port is in use for any
reason on the machine where you are installing the
Sensor Gateway, you can use a different port.
By default, Sensor Gateway runs on
port 443.
Optional:
Certificate
private key's
passphrase
As a recommendation, at the time of certificate
generation provide a password to protect the private
key. When prompted during the Sensor Gateway install
provide the same password.
The Sensor Gateway uses the same password to use
the certificate and encrypt the communication between
the sensor and itself.
Provide a password if
your sgw_key.pem is password-
protected.
The Sensor Gateway service starts and registers itself with the Carbon Black Cloud. It takes
few minutes for the registration to complete.
Results
Once the registration completes successfully, the Sensor Gateway displays as connected in the
Settings > API Access > Sensor Gateways page of the Carbon Black Cloud console.
The Sensor Gateway name comes from the API key.
What to do next
The Sensor Gateway is reliable and highly available. You can deploy more than one Sensor
Gateway servers and configure them in an HA mode (manually) to handle the traffic at an
acceptable latency. If a Sensor Gateway server fails due to connection or resource threshold, you
can spin up another Sensor Gateway instance to take over in managing the connections.
Update Sensor Gateway Certificate
You can update the SSL certificate on a Linux Sensor Gateway when the certificate is about to
expire, or it has been compromised, and avoid getting the sensors permanently disconnected
from the Carbon Black Cloud.
VMware Carbon Black Sensor Gateway User Guide
VMware, Inc. 37

Prerequisites
Verify that all sensors are connected to the Sensor Gateway to access and download the new
certificate. When you upload a new certificate, Carbon Black Cloud sends it to each sensor
inidividually.
Important Virtual machines that are shut down might not receive the new certificate. The
sensors are not able to connect to the Carbon Black Cloud when the new certificate is replaced
on the Sensor Gateway. Therefore, to receive the new certificate and avoid connectivity issues,
ensure that all sensors connected through the Sensor Gateway are in an active state.
Procedure
1 Obtain a new certificate.
The new certificate must have the same common name (CN) as the current certificate.
2 Navigate to the Settings > API Access > Sensor Gateways tab and double-click the Sensor
Gateway for which you must renew the certificate.
3 In the Sensor Gateway Details section, select the Options drop-down menu and click Update
certificate.
4 Click Upload File, select the newly obtained certificate, upload it, and click Close.
It takes up to eighty minutes for the process to complete depending on the number
of sensors connected to this Sensor Gateway. The Carbon Black Cloud sends the newly
uploaded certificate to all sensors connected to the Cloud through this Sensor Gateway.
Then, each sensor sends a status back to the Cloud confirming if it has successfully accepted
the new certificate. The Carbon Black Cloud console displays only the errors received by the
sensors.
5 To see errors reported by the connected to the Sensor Gateway sensors, navigate to the
Inventory > VM Workloads > Enabled tab.
a Select the Sensor Gateway from the Sensor Gateway filter facet.
b Select Errors from the Status filter facet.
c To see the details for the sensor reporting the error, double-click the relevant row.
d You might fix existing errors by uploading the new certificate again.
If the errors are still present, contact Carbon Black Cloud Support.
Important Continue with updating the certificate on the Sensor Gateway only if there are no
errors reported by the sensors connected to this Sensor Gateway in the Carbon Black Cloud
console.
VMware Carbon Black Sensor Gateway User Guide
VMware, Inc. 38

6 Replace the SSL certificate of the Sensor Gateway.
a Rename the new certificate to sgw_certificate.pem and its private key to
sgw_key.pem.
b
Copy the new certificate public and private keys to the /data/certs folder on the
Sensor Gateway device.
c Restart the Sensor Gateway by first retrieving its container ID sudo docker ps -a and
then running the command sudo docker restart <contained id>.
Results
It takes up to five minutes for the Sensor Gateway to register again with the Carbon Black Cloud.
Upgrade Your Linux Sensor Gateway
You upgrade your Sensor Gateway by running a dedicated upgrade script.
Note Upgrade of the Sensor Gateway does not enable proxy support. To have your Sensor
Gateway environment configured with proxy, you must re-install the Sensor Gateway.
Prerequisites
n Ensure you have the following information available from your initial Sensor Gateway
installation.
n The Sensor Gateway Entry point. Use the same name as before. If not, the existing
sensors can stop working.
n API ID
n API Key
n The following Carbon Black sensor versions are supported with the Sensor Gateway.
n Carbon Black sensor for Windows 3.8.0.684+
n Carbon Black sensor for Linux 2.13.2.997598+
n Ensure the old version of the Sensor Gateway is running and has an active connectivity with
Carbon Black Cloud.
Procedure
1 Download and unzip the sensor-gateway-x.x.x.zip file on your Linux server.
VMware Carbon Black Sensor Gateway User Guide
VMware, Inc. 39

2 Identify the current Sensor Gateway and stop it.
a Log in to the Linux server with root credentials.
b To get the running instance of the Sensor Gateway, excecute the command:
docker ps
The first column displays the Container ID.
c To stop the running Sensor Gateway, execute the command:
docker stop <the Container ID>
d To get a list of all containers and thus, see the Sensor Gateway instance as exited under
the Status column, run the command:
docker ps -a
e Remove the Sensor Gateway instance.
docker rm <the Container ID>
f Get a list of all containers and confirm that there is no Sensor Gateway, which is in
Running or Stopped status.
docker ps -a
If you do not see any result from executing the command, it indicates that the previous
commands might not have been successful. Please, do not proceed with the next step
and contact Carbon Black Support.
3 cd to the directory where you unzipped the latest version of the Sensor Gateway file.
4 Install the Sensor Gateway.
./sensor_gw_install.sh
Prompts you for the same data as during the initial Sensor Gateway install. For more
information, see Install Sensor Gateway on a Linux Server.
Results
Your Sensor Gateway upgrades successfully.
VMware Carbon Black Sensor Gateway User Guide
VMware, Inc. 40
